Easter Graphics
Showing posts with label family. Show all posts
Sunday, March 31, 2013
Friday, March 23, 2012
Happy Birthday To My Daughter Melissa
Today I want to wish my first born a Very HAPPY BIRTHDAY!!!
She makes me so proud of the beautiful woman she has become both inside and outside.
She makes me laugh with the funny things she has to say.
She's the beat of my heart, and the air that I breathe.
She's the sun and the wind, and autumn’s golden leaves.
She's the pride that I feel when I know she's done what’s right.
She's that warm feeling I get, when I remember tucking her in at night.
She is homework and sports, and a busy social life.
She has this beautiful smile that could light the darkest night.
I hope the man that steals her heart, will treat her like a queen.
Because she deserves so much more, than a man that treats her mean.
I will always cherish the wonderful times and those to come.
The best part of my life is being her Mom.
So now you know who she is, she's my little girl.
I love her with all my heart and I always will.
www.FamilyFriendPoems.com
Thanks for popping in and if you get a chance please leave a couple good wishes for my sweetie on her special day.
Saturday, November 5, 2011
My Beautiful Daughter
Today I am posting my first project on Really Reasonable Ribbon's blog and I chose to share a project I made using my beautiful daughters picture.
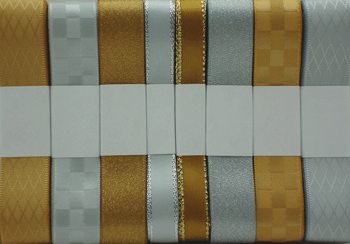
This month at Really Reasonable Ribbon the Ribbon assortment is so Delicious! Look at all those rich Gold and Silvers.
Are you a member of the Ribbon of the month? Let me tell you there are some great perks to getting these assortments. I have found that I try ribbons I would have never seen or tried unless I got them in the Ribbon of the month assortment.
This month at Really Reasonable Ribbon the Ribbon assortment is so Delicious! Look at all those rich Gold and Silvers.
Are you a member of the Ribbon of the month? Let me tell you there are some great perks to getting these assortments. I have found that I try ribbons I would have never seen or tried unless I got them in the Ribbon of the month assortment.
Let me share a recycle project and fun design using some of my favorites.
I found this shadowbox frame in clearance because the side had a tear where the price tag or a label was.
Now doesn't that yummy ribbon work well right there?
This silver diamond pattern can be found in this great assortment also .
I also used the Silver Satin with Silver Edges to make bows and decorate the corners.
I wanted to share that that beautiful green flower is a gift from a talented Natasha.The red flowers are from Wild Orchid Crafts.
So hopefully you are signed up to receive your Ribbon of the month assortment- you are going to love it!!!
Saturday, September 24, 2011
My Family Wedding Album(Heavy Pics)
Today I want to share an album I finally put together from my youngest Son and Daughter-in-laws wedding in January
I started with this 12 x 12 ring bound album shell.
There was no way I could use just a plain shell like this so I set forth to decorate. The first step was to use batting on the front and back
This is what the plain album looked like. I tried to move these pictures to the beginning but blogger wanted them right here.LOL
This shows a view of how I placed the book on the Upholstery fabric I found on clearance at Hobby Lobby.
The wedding colors were black and red and white.
Here is the front of the album with our family photo(one son is missing-he was in Afghanistan)
I hinged the front picture(An idea from Natasha) and placed a second picture of the couple releasing doves. It was one of my favorite parts of the ceremony.
The sentiment is from Sweet Stamps and worked this perfectly for my front cover. There is a doily from my stash and flowers and leaves from my stash. It was the same ones I used for their wedding things I made for them.
Isn't this a great fabric for a cover?
I wanted to share what I did with the 300 photos I had made from the wedding.
These 6 pane sheets are from Close To My Heart.
I also wanted to share that I got a great deal on-line from Snapfish and was able to print all 300 pictures for $30.00 some dollars. Next time you are looking to print-do a search on-line for deals.
Thank you so much for popping in and taking the time to look at my family album.
Tuesday, September 20, 2011
Sweet Stamps-Anything But A Card Challenge This Week
Yes ,can you believe the challenge this week at Sweet Stamps is to make
ANYTHING BUT A CARD
I love when we have these type challenges- it is a open invitation to create so many new ideas.
Remember each week Sweet Stamps has a challenge and chooses a winner to receive a $20.00 credit in the store.
This week I used:
This is a fun layout of my daughter-in-law that just seemed to go together with bits of this and that.
All the Sweet Stamp images were stamped on Craft Vellum, then it was so easy to just color the back side.
I had to do one more quick project with some extra goodies I had on my desk. I used two of the Shopping Bags from Creative Cuts and More. The small flowers from above were used again on this project. I received a new Cheery Lynn die-Fanciful Flourish.Now I know I will be using this die many, many times.
So won't you show us what your making this week?
There are only a FEW rules.
Remember, you can only enter the challenge one time, those using Sweet Stamps images will get an extra drawing in the challenge. Please limit the amount of challenges to 10 (including ours) You must link back to us in your blog post.
There are only a FEW rules.
Remember, you can only enter the challenge one time, those using Sweet Stamps images will get an extra drawing in the challenge. Please limit the amount of challenges to 10 (including ours) You must link back to us in your blog post.
Hope to see you join us this week and every week.
Monday, September 19, 2011
You Are Going To Love This One
Welcome Everyone,
I am so thrilled to finally share a new product I had the opportunity to review- pictures on canvas.
Brendan, from Easy Canvas Prints contacted me a while back and asked if I would be interested in picking a canvas.
Now I didn't have to be asked twice that is for sure!
I want to share a little about the experience.
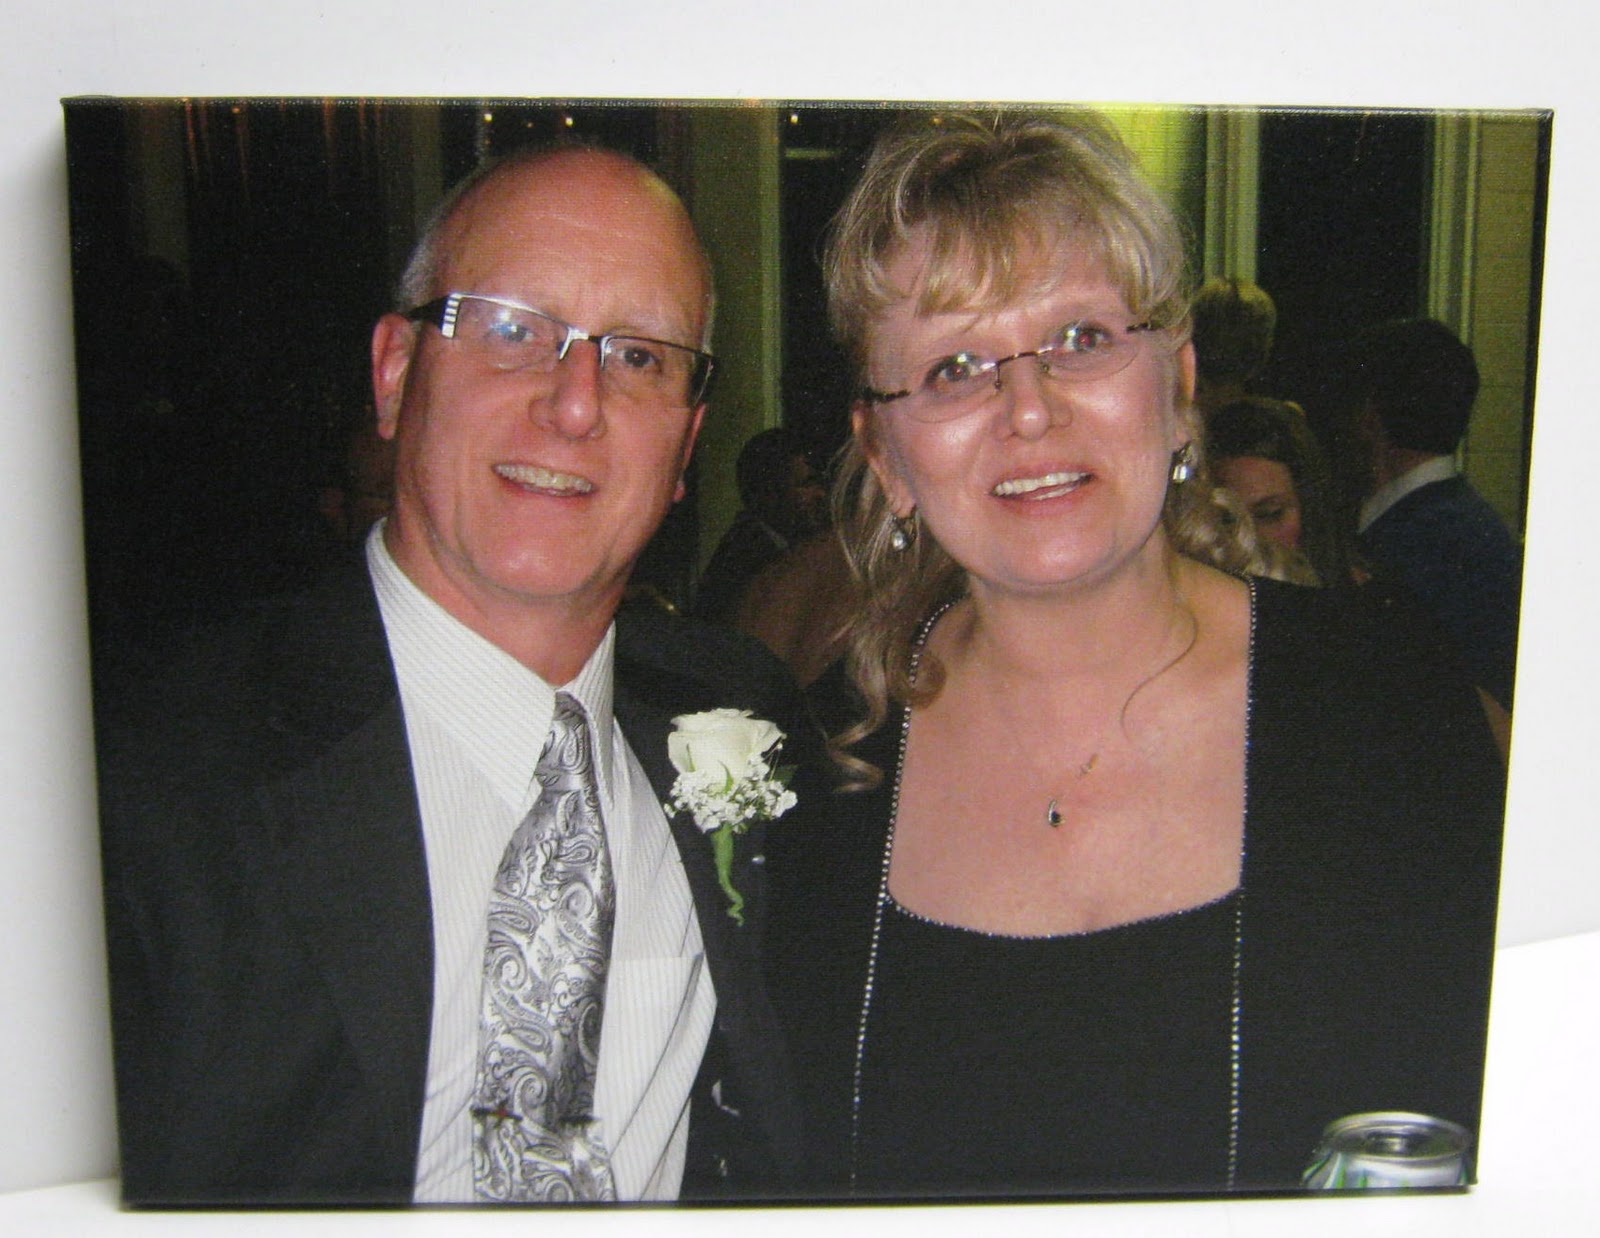
This is one of my favorite pictures of my honey and I at our youngest son's wedding this year.
I wish I could show you how beautiful the colors are and so realistic-this picture doesn't do it justice.
I am so thrilled to finally share a new product I had the opportunity to review- pictures on canvas.
Brendan, from Easy Canvas Prints contacted me a while back and asked if I would be interested in picking a canvas.
Now I didn't have to be asked twice that is for sure!
I want to share a little about the experience.
I'd be happy to provide you with an 8"x10" canvas made from the photo of your choice. I will be providing you with a unique promo code, which will allow you to receive your 8”x10” canvas, completely free (shipping included)! The code also allows optional upgrades, for a small fee. If you choose to make no upgrades, you will of course pay nothing.This is how the process starts with a blank space to give you an idea of how your picture would look say in your living room setting.
- Select your canvas size (I chose to upgrade to a 11 x 14)
- select canvas wrap thickness from 3/4 of an inch to 1 1/2 inches thick
- Next you upload your print
- This is one of my favorite things-It tells you the quality of the print you just uploaded (sure would hate to receive a bad quality print)
- select the border options- there are many options -(I chose single sides)
- add image and many color effects that are available (sepia,black & White, do touch ups)
This is one of my favorite pictures of my honey and I at our youngest son's wedding this year.
I wish I could show you how beautiful the colors are and so realistic-this picture doesn't do it justice.
I had to share a picture of the wrap around printing, this is so nice looking and may be the reason I choose not to frame this picture.
My friend suggested that I place this in a scrolled black easel and no frame.
I have to say that I was thrilled to work with
I have noticed there are specials and I am hoping, crossing my fingers, I get asked to write another review. I would also love to offer one of these as a giveaway.
If you are looking for a personalized gift,a gift that will touch someones heart, or just a favorite print made into a beautiful canvas.
You need to go to Easy Canvas Prints and I can tell you that you won't be disappointed.
I have been compensated with this 11 x 14 for writing this review- but I would not endorse a product or service I wouldn't use myself. This was a truly enjoyable experience, easy to use, and such a wonderful product to receive.
Sunday, September 11, 2011
You Belong In Film
That is you belong in a filmstrip picture display!
Creative Cuts and More has this Filmstrip Large die cut that is perfect for this display.
Measurements:Outside measurements: 3-1/8" wide x 4-3/4” high.Inside measurements: 1-5/8” wide x 1-7/8" high.
I started this project with two-one in gray,the other in black.
This die cut is also available in filmstrip small if you would like that size better.
I used white card stock on the back with a few pictures. I used Pizzazz Aplenty pearls to add the pearl dots in the open areas and the paper flowers.
I used my favorite tool-Crop O Dile to make holes and add eyelets. Ribbon from my stash was added to connect and adorn.
So I would love to hear what you think of my display piece...I was thinking of using this on a layout as adornment.
There are many die cuts available at Creative Cuts and More that can be used in this manner- hope you share some of your ideas.
Saturday, September 10, 2011
When I Was Little
Well it is finally done!
This layout has been sitting on my paper rack for months-really just the fun ladies with wings on the background paper.
These are picture of me and my lil brother(We only said we were because we grew up together)
Many of these photos are new to me, I never seen them till my lil brothers mom brought them for me.
I used some distressed metal tags to put some words.
I used some lace, buttons from my stash. The ribbon is from Stampin Up.
Thanks for checking out my layout, so glad I could share with you.
Oh yea, if my lil brother is checking this out on Face book- I might be a smidgen older but I am still the cute one! LOL
Happy Birthday in a couple days!!!
Sunday, September 4, 2011
Happy Birthday To My Youngest- Layout
Happy Birthday to my youngest son today -It makes me feel pretty old actually.
When did it happen that I am old enough to have adult children?
Here is a layout I have had sitting on my desk ,I would add bits and pieces to it once and while.
When did it happen that I am old enough to have adult children?
Here is a layout I have had sitting on my desk ,I would add bits and pieces to it once and while.
Close up of some of the embellishments I used
Circle Paper is Making Memories The fun fabric letters are from Prima. The patterned paper is from Imaginisce.
I found most of these embellishments in my stash of unused items.
Fun and quick to finish off.
Thank you for popping in and checking out my family layout- always nice having you visit.
Saturday, August 20, 2011
A Paper Cake Tutorial-just for you
Well I am sharing a tutorial today that I shared before- I made a decorated cake as a gift for my daughter-in-law( for her and my sons wedding).
I get a lot of questions about how I put these cakes together to make the designs- so that is why I am sharing this beauty one more time.
I started with a great Cake Slice Box Set-Two Tier. and Dress & Tuxedo Box Set.
Now you could cut your own patterns if you wish.
There is nothing better then having each piece perfectly cut and scored. No guess work was needed to make sure it all was the same.
I really thought about making it with the brides color choices- red and white base- but went with Lily White for all the pieces.
I am going to share a few steps along the way making this beauty
I found a cake platter and doily to use along with the package.
This is what the cake slices look like flat-I also showed how I refolded all the score lines before I started assembling. I used some
Killer White Tear-able Tacky Tape - 1/4" to all the flaps.
*** I used this since this finished cake had to be wrapped and sent 1600 miles and I wanted to make sure it held together through everything***
Here is a couple views of the cake slices assembled- I used the Atg tape in between to hold the slices together.
Tissue paper was used inside each cake slice to help hold the shape- again this isn't necessary but I knew I was adding a lot on the top in weight and then sending in the mail.
Here I wanted to show you how I once again pre-folded the score lines before assembling.
Assembling the tuxedo went together very quickly- just a little tape to hold the shirt in place.
I folded the lapels and taped them down to hold in place.
Now the brides dress was customized by me to match my future DIL's dress- used some white tissue paper and white tulle to make.
Here is a finished view of the extra ones that were added to the package (I did make two sets ).
On this brides dress you can see the folds and pearls.
I added a flower and leaves for the grooms corsage.
I have included a few extra views of this finished project.Ribbon, pearl bead trims, tulle, and small red paper flowers are from Hobby Lobby I also purchased the Prima flowers from Hobby Lobby.
So glad you have popped in to visit today, I so enjoyed sharing this special gift with all of you.
Subscribe to:
Posts (Atom)