Join me at Dawn's Craft Place


Alis Volat Propriis means"She flies with her own wings."
Showing posts with label Deco-art Paint. Show all posts

Tuesday, November 11, 2014

U @ Me Layout!

Isn't my daughter a beauty? I just love to use these pictures I have of her with her and her kitties.
I did this larger picture of her in sepia and love how it looks.
 Used several chipboard pieces and the twine is from Really Reasonable Ribbon.
 I had some canvas pieces I used here
The background paper had raised embossing and then I used several TCW stencils to add dimension and color with embossing paste and Deco art paint.
I think this is one of my favorite layouts I have done in a long time.
Thanks for stopping in I so appreciate your visits and comments.

Friday, October 17, 2014

Unity Friends With Flair

It is Friday Friends With Flair at Unity... I have a quick post with a real quick card I put together.
 AUGUST-2014-SUMMER-COLLAPSED-INTO-FALL
I used the August kit of the month from Unity Summer Collapsed into Fall {kom 8/14} and these are fabulous ! I added crackle to the hats and love the effect.
The twine is from Really Reasonable Ribbon, the paper is from my stash and the vintage snaps from my sewing supplies.

Wednesday, October 15, 2014

Halloween Cards

How fun is this card? I used Tim Holtz dies,stamps,and grungeboard letters,and ink.
 I did several layers of Deco Art crackle medium and Media fluid paint in several colors.
I used several inks after using crackle medium.
 How about a quick card using October afternoon postcard and lots of yummy ribbons and twine from Really Reasonable Ribbon. Papers were from my stash of Halloween supplies.
Thanks for stopping by to check out a couple of my cards, I had so much fun making these and using so many supplies I have been saving.
Hope your having a great week.

Tuesday, September 30, 2014

Bloom Girls Workshop


Last year I signed up for a class with Jamie Dougherty to paint Bloom girls.
 
Well I finally sat and finished my girls on 12 x 12 wood. 
Jamie is one of the most talented ladies I have admired forever...I am not an artist but I felt like one when I finished these ladies.

So glad I could share my pictures with you today.
I used everything from my stash to do these girls.

Thursday, September 11, 2014

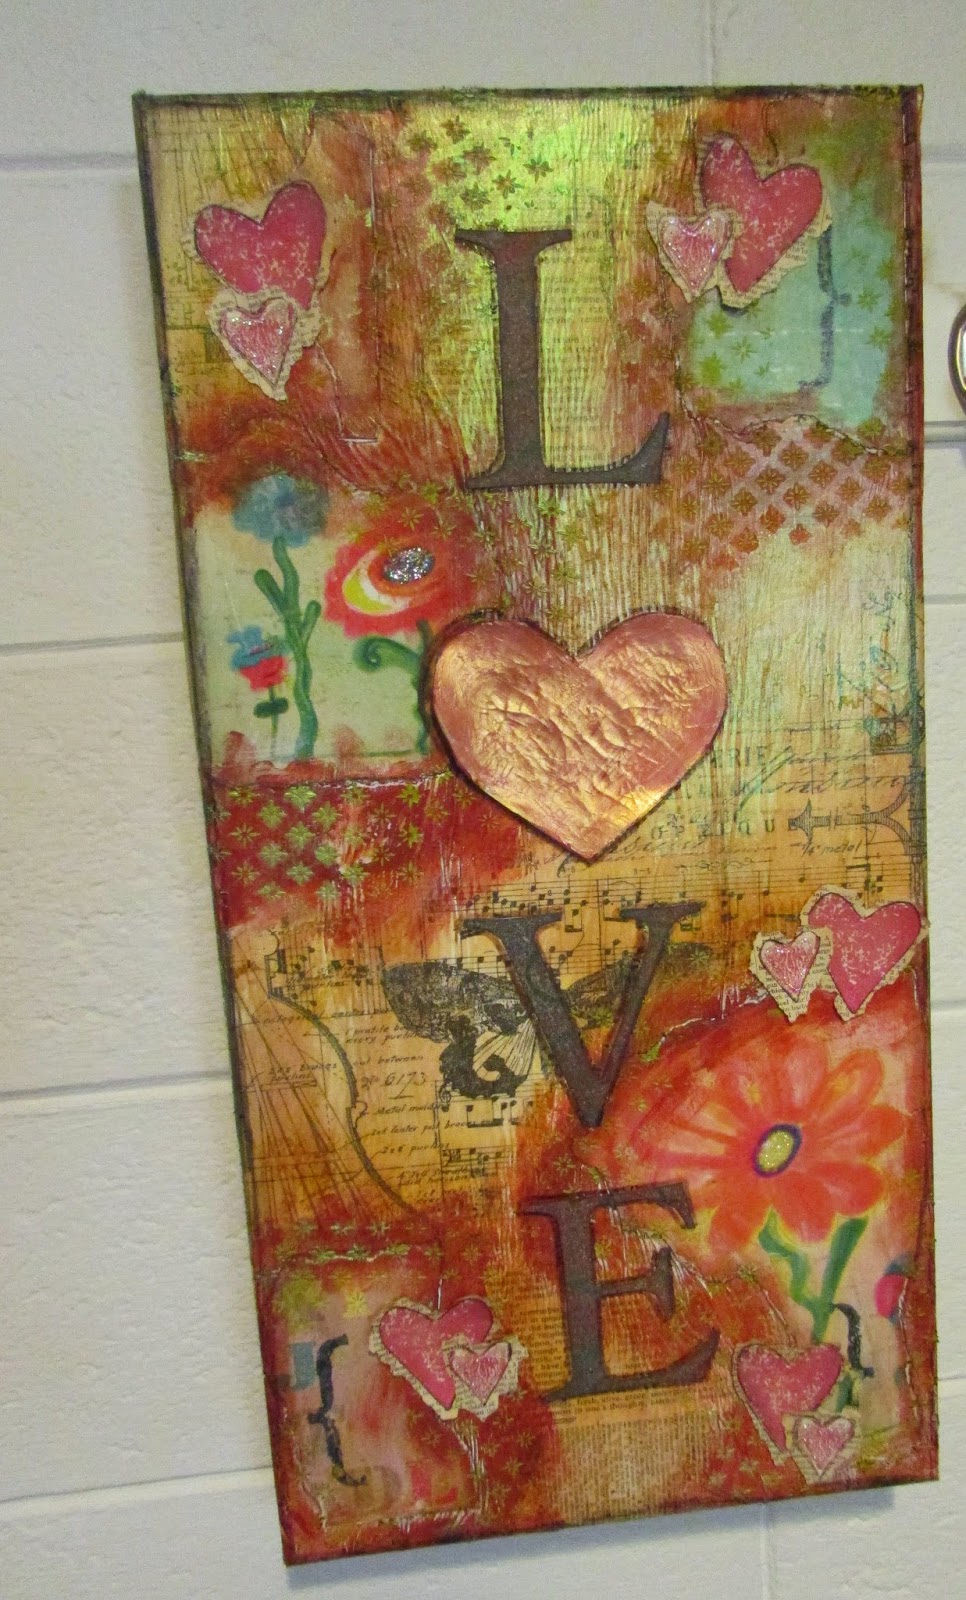
L.O.V.E...

Today I have a Mixed Media project to share using Susan K Weckesser and some of my favorite products. For the month of September our design team at Susan K Weckesser were asked to share mixed media projects.
Can you believe I made two canvas pieces? I always like to have more then one project when I am playing with new ideas. I can't decide which one I like more.
 
I used this fabulous Susan K Weckesser Unity stamp set.
This is the one sheet of paper I used for the background and the backside for my large letters.
This is the very large Unity Stamp I used for my canvas
ANG-006-L-O-V-E
 Let me share a few steps along the way. This is a 12 x 24 canvas that I covered with Tim Holtz tissue paper.I used scraps of some Susan K Weckesser paper and tore extra from the sheet above.
 The large hearts were stamped with Deco-Art Media paint and Crackle paint added to distress.

These hearts were stamped with Memento ink and then distressed with Tim Holtz Antique Linen ink.Next I added the fussy cut hearts to old book pages and tore the shape roughly.
 One of our partners at Susan K Weckesser is TCW -The Crafters Workshop, they supplied us with so many Fabulous stencils. The one I used to add dimension to my canvas is called Mini North Star and worked wonderful with Deco -Art modeling paste and Green Gold Media Paint.


If you click on any of the pictures you can get a closer look at the texture and detail.
Let me know if you have any questions and I will get back to you.

I know this has been a long post this time, I just wanted to share as many pictures and angles as I could. Thanks for checking out my project,hope you leave a comment to let me know what you think.


Wednesday, September 10, 2014

In The Garden

Today I have a quick post with a potting bench I altered for my garden. This was a bench I have had for so long, it has been inside my house. I finally decided to put it outside but wanted it to have a little more pizazz!
Here is my basic cream bench not spectacular but usable.
I taped it off so it was a stained glass looking pattern.I love to use Deco-Art paints for so many projects and always have them out on my desk.
After it was painted and I cleaned up the lines where the paint leaked under the tape, just used a cream paint to cover. Then I sealed the bench with a varnish.


Glad I could share my quick bench...I enjoy seeing it when I am outside in my garden.
Thanks for your visit today.

Tuesday, June 24, 2014

Come Sail Away

Welcome to my first post with the Susan K Weckesser Design team.I posted over at the blog yesterday. Just in case you didn't get to see it let me share the canvas I made.
I must say I had so much fun creating with this adorable  Sail Away  stamp set from Unity.
Let me share a few steps I did to create.
 This is one of my heavy paper pads that I stamped several copies of the Sail Away stamp.

The 12 x 12 canvas was easy to prepare. I put a layer of Mod Podge down and added torn sheets of tissue paper to add layers.
 While the canvas was drying I was able to work on painting the Sail Away  images. I loved mixing and blending several colors and allowing them to dry.
 One important step is to make sure all the tissue paper is trimmed and pushed down on the edges.
 Look how easy it is to blend and make the sea background, I left some white tissue exposed.
Once all the  Sail Away images were dry I was able to fussy cut them. 

 I used Susan K Weckesser's stencil to accent my thick white ribbon, first with ink and then with paint. I stamped and embossed the sentiment from Sail Away on a piece of vellum. I attached the sentiment with some eyelets and layered it on top of a tri-blue piece of ribbon.

 Wanted to share a close up of all the images~I pop dotted all the larger images with the waves. I also decided to cut a few extra images and cut out just the sailboat. I also decided to add some clear lacquer to make the sailboats shine!
 Thanks for your visit, would love to hear what you think of my first canvas project .